Why this video is useful
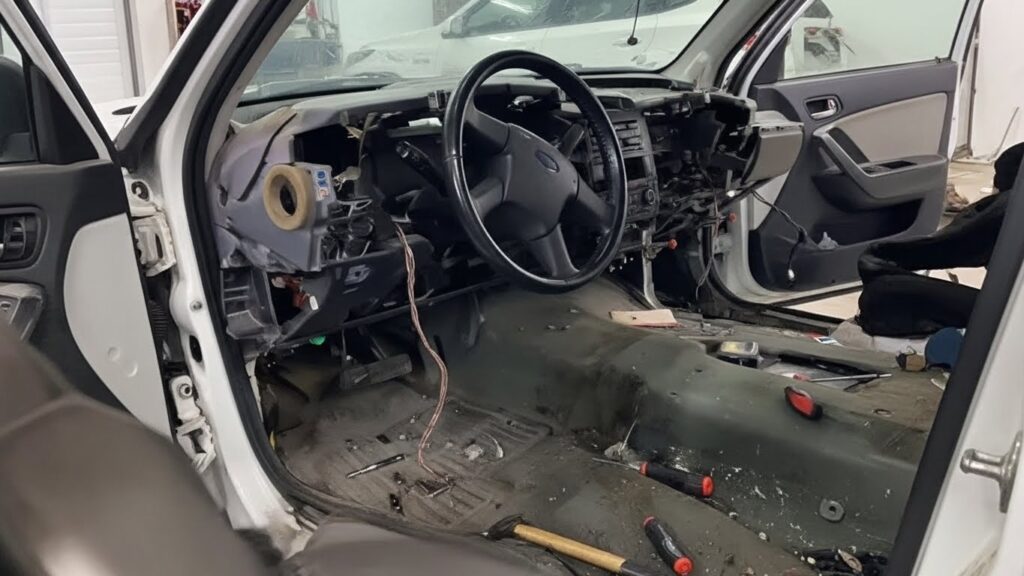
- The video walks you through how to remove the dash on a 2004 Chevy Silverado — which is the same basic dash used on most 1999‑2006 Silverado and GMC Sierra models.
- It shows both the dash pad removal and full dash‑structure removal, so you see each step — not just the superficial trim removal.
- The video’s creator mentions that this is more in‑depth than many “dash‑removal” tutorials, making it valuable for anyone working on dash replacement, heater core swap, wiring work, or interior restoration.
📌 What to watch for / things to know before you start
- The procedure covers upper dash pad removal and full dash disassembly — which means removing trim panels, screws/bolts, disconnecting wiring harnesses, and carefully pulling the dash out so you don’t damage components.
- If your truck has airbags or extra wiring (power windows, radio, climate control, etc.), the removal requires extra caution and careful un‑plugging of harnesses. Several related videos in the same truck‑dash style (1999–2006) emphasize unplugging the wiring harness, removing bolts under and around the steering column, and carefully maneuvering the dash out.
- You may need basic tools (screwdrivers, socket set, trim removal tools) and patience. The complexity depends on whether the dash has been modified, how many accessories are wired in, and whether the dash is being fully replaced or just temporarily removed.
🛠️ Step‑by‑step overview (as inspired by the video and other similar guides)
- Disconnect battery — always start by disconnecting the negative battery terminal to avoid short circuits, especially with airbags and electrical components.
- Remove dash pad and trim panels — unscrew or unclip all trim pieces, including around glovebox, radio, vents, and instrument cluster.
- Unbolt dash assembly — there are bolts under the steering column, under the dash, at the firewall, and sometimes behind trim panels that secure the dash structure.
- Disconnect wiring harnesses, radio, A/C controls, and other modules — carefully unplug wires; some connectors may be tight and require pushing tabs or prying gently.
- Remove the dash — with all bolts and wiring disconnected, carefully pivot or lighten the dash, then pull it out — typically through the front, being mindful not to scratch doors, dash, or trim.
- If re‑installing (or installing new dash), reverse the process carefully — ensure all wiring harnesses are plugged, bolts are tightened, trim is aligned, and battery is reconnected only after full reassembly.
⚠️ Important Safety & Practical Tips
- This job can be time-consuming — depending on how many components are connected, it may take several hours.
- Work slowly and methodically — rushing can break tabs, scratch interior parts, or damage wiring.
- If your truck has airbags, make sure you handle with extra care — airbag modules and wiring should be treated carefully to avoid triggering or damaging them.
- Keep organized trays or containers for screws/bolts/trim clips — there are many different sizes and types, and mixing them up can cause problems when reassembling.
- If at any point you’re unsure — especially around wiring or air‑conditioning components — consider consulting a professional mechanic.
✅ In short
The video “Dash Removal 99‑06 Chevy Silverado GMC Sierra” is an excellent, detailed guide if you want to remove (and possibly replace) the dashboard on your 1999–2006 Chevy Silverado or GMC Sierra. It shows step by step how to get the dash out, including pad removal, full dash disassembly, handling wiring and trim, which tools you might need, and how to safely carry out the job.